Disclaimer: This guide involves modifying your Lenovo T400s hardware. Proceed at your own risk. We are not responsible for any damage to your system.
Uncovering the Hidden ExpressCard Slot on Your Lenovo T400s
If you own a Lenovo T400s notebook (specifically the 2808-D9G model) for work or personal use, you might have noticed a frustrating limitation: the apparent lack of an ExpressCard slot. However, during a routine keyboard cleaning, an interesting hardware secret was revealed. Behind the default SD card reader lies a fully functional, hidden ExpressCard slot. This discovery allows you to easily upgrade your notebook's connectivity and expand its capabilities without purchasing a new machine.
In this comprehensive guide, we will walk you through the step-by-step process of safely removing the factory-installed SD card reader to access the ExpressCard slot underneath. Follow along carefully to unlock this hidden feature on your Lenovo T400s.
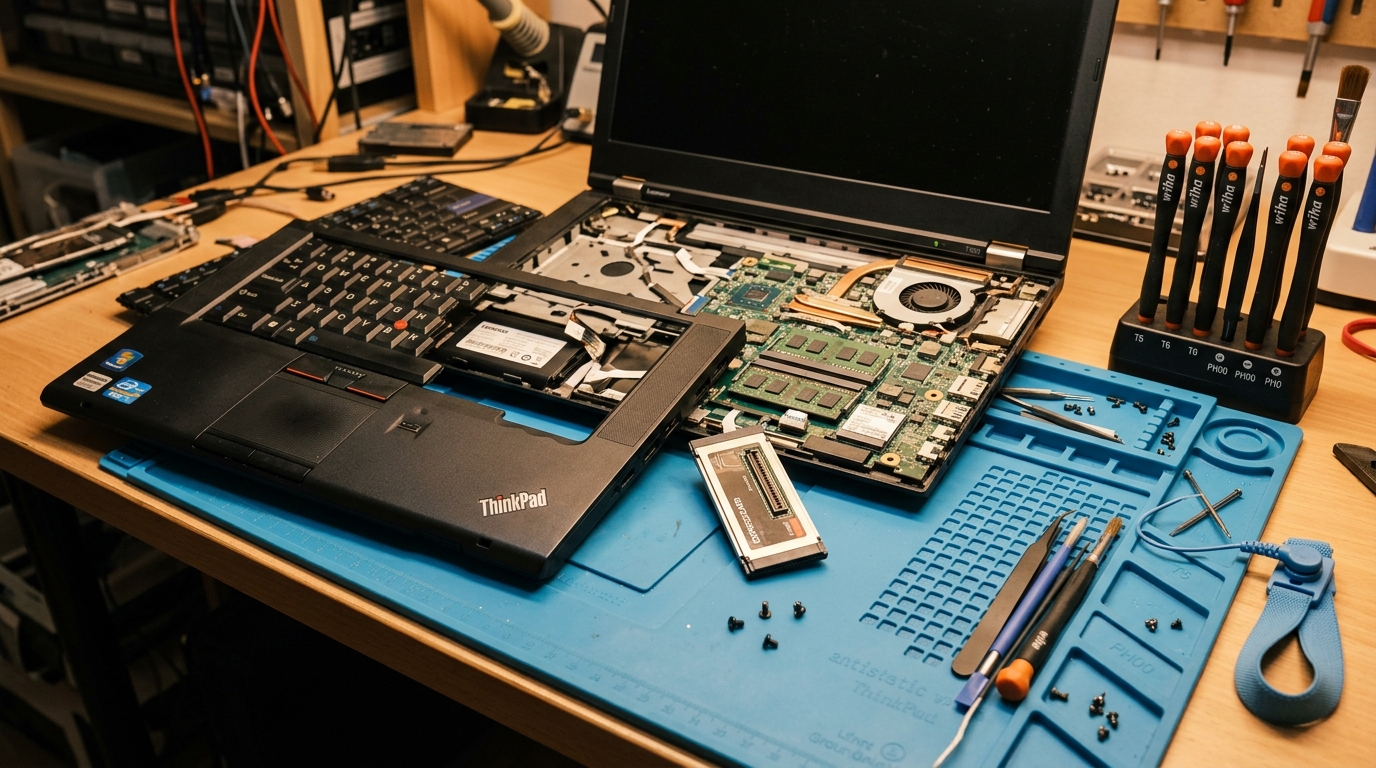
Step-by-Step Guide to Removing the Card Reader
1. Prepare the Notebook: First, ensure your laptop is completely powered off. Remove the main battery. Locate and unscrew the designated screw that secures the RAM coverplate on the bottom of the laptop.
2. Unscrew Keyboard Fasteners: Once the RAM coverplate is off, look for two specific screws indicated by a small keyboard symbol engraved next to them in the plastic casing. Carefully remove these two screws to release the keyboard.
3. Detach the Keyboard: Turn the laptop over and gently lift the keyboard. Be extremely careful not to pull hard, as the delicate ribbon cable connecting the keyboard to the motherboard is still attached. Disconnect the ribbon cable, then locate and remove the single screw holding the card reader assembly in place.
4. Eject the Card Reader: With the retaining screw removed, gently push in the card reader module from the outside of the laptop casing. You will notice that the entire module pops out just like a standard ExpressCard, revealing the slot.
5. Reassemble Your Lenovo T400s: Reconnect the keyboard ribbon cable, seat the keyboard back into place, and secure it with the screws on the bottom. Replace the RAM cover and the main battery. Crucially, do not reinstall the card reader retaining screw. You now have full access to a working ExpressCard slot on your T400s!
This hardware trick is a great way to expand the utility of an older machine. It appears this hidden feature is a known quirk among enthusiasts; you can read more about other users' experiences in this NotebookReview forum thread discussing the hidden T400s ExpressCard slot.
Frequently Asked Questions (FAQ)
Why did Lenovo hide the ExpressCard slot on the T400s?
Lenovo likely designed the chassis to accommodate multiple configurations. For models shipping with an SD card reader, they simply utilized an ExpressCard-to-SD adapter module that occupies the existing ExpressCard bay, securing it with an internal screw to make it a permanent fixture.
Can I hot-swap ExpressCards after performing this modification?
Yes, once the internal retaining screw is removed, the slot functions as a standard, spring-loaded ExpressCard slot. You can insert and eject compatible 34mm or 54mm ExpressCards while the system is running, provided your operating system supports hot-swapping for that specific peripheral.
Will removing the SD card reader void my Lenovo warranty?
Opening the chassis and removing internal components generally risks voiding the manufacturer's warranty. However, since the T400s is a legacy machine, it is highly likely that your device is already well past its official warranty period.